Making Lenses With a 3D Printer
Alex Bock 2022-06-27
Overview
Here is how I use a standard filament-based 3D printer to create optical lenses:- Generate 3D model of desired lens shape
- Print lens blank in PLA
- Polish lens blank
- Cast silicone mold of lens blank
- Cast epoxy resin in silicone mold

Generating the shape
I wrote an OpenSCAD script to generate 3D models of spherical lenses. It will generate a model based on the desired lens diameter, lens thickness, and diameter of curvature. An experimental variant for fresnel lenses is also available.
Printing the lens blank
While optimal detail and surface quality would be obtained by generating the lens with a square or hexagonal profile and printing vertically, I have found that printing a round planoconvex lens lying flat at 0.05 mm layer height is acceptable for short focal lengths. For lenses with a focal length beyond 100 mm, or for lenses with a concave surface (which is much more difficult to hand-polish than a convex surface), a square or hexagonal base should be added in OpenSCAD or the slicer to print vertically.
Polishing the lens blank
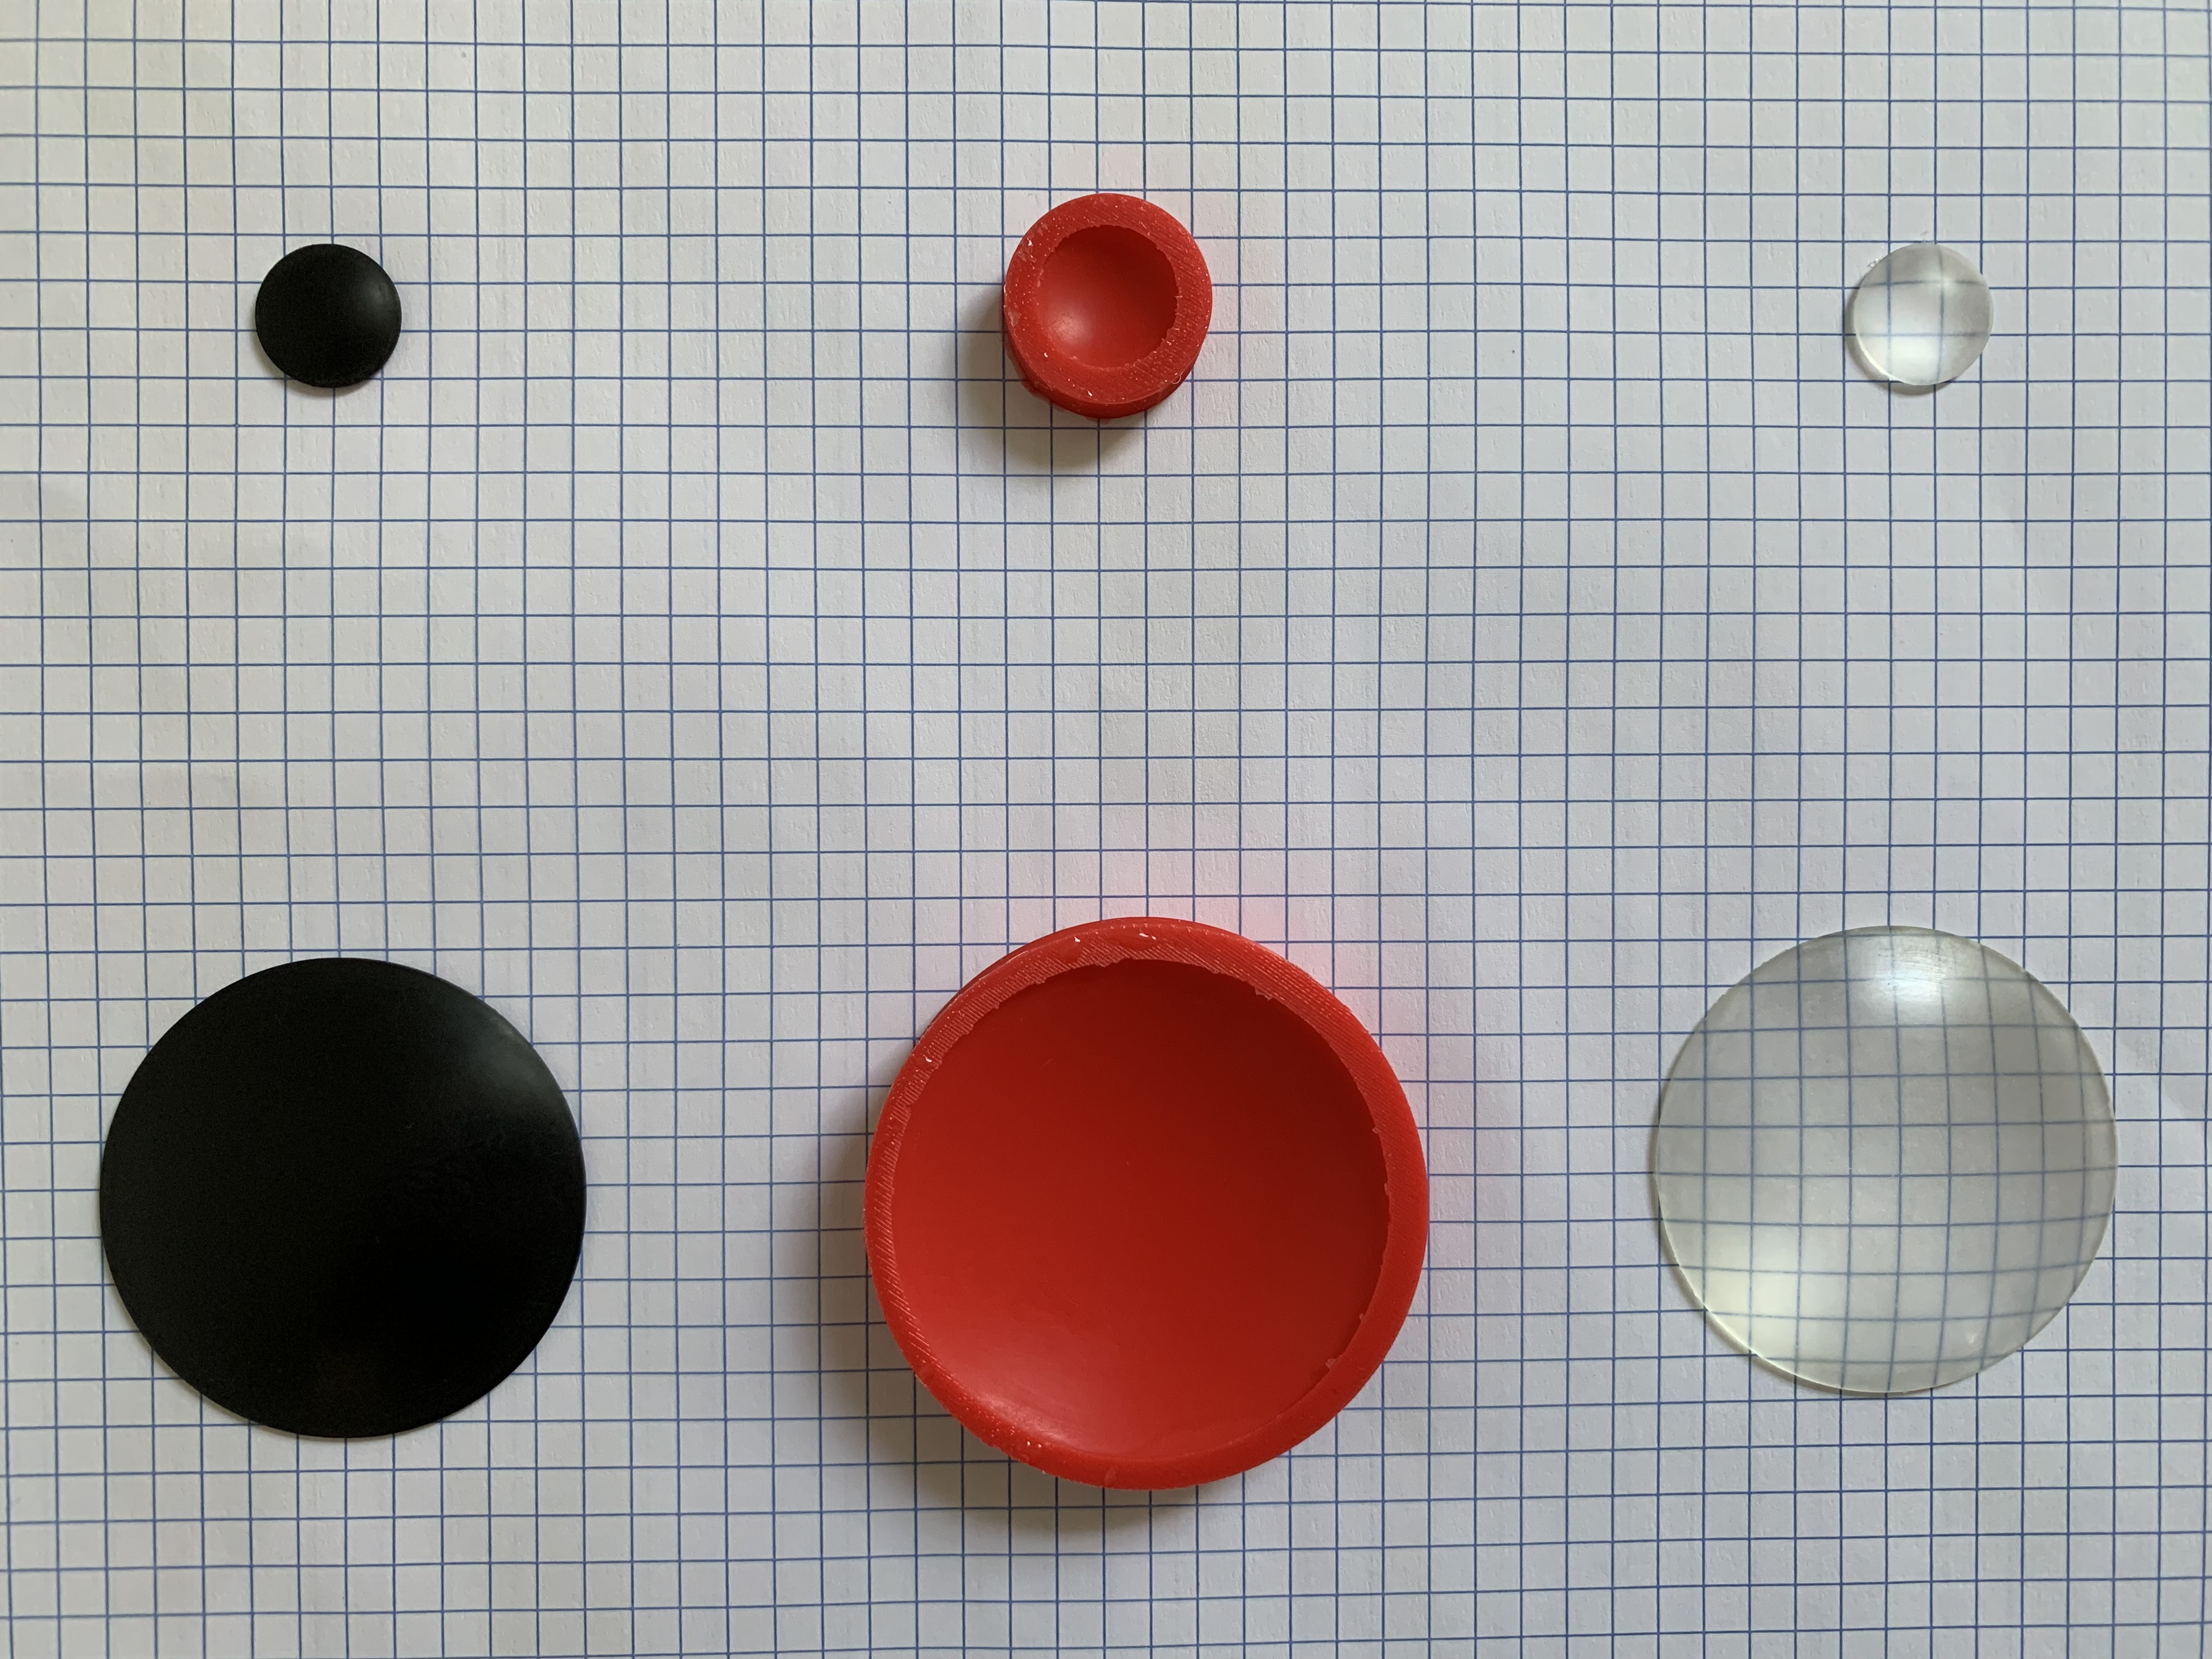
I sand the lens blank by hand with sandpaper in five stages starting at 120 grit and ending at 3000 grit, taking care not to allow folds or flexing in the sandpaper to create deep scratches. The lens is then given a final polish with a slurry of cerium oxide in distilled water using a cotton ball. The lens is not adequately polished until you can clearly see your reflection when looking straight toward the surface. This is easiest to judge using plain black filament.
Casting the silicone mold
I print a thin tray in which to create the silicone mold. The dimensions of the tray are such that the lens can sit on its floor face-up with the walls of the tray extending a few millimeters above the highest point of the lens. Then, I mix a two-part silicone molding compound and slowly pour it onto the lens to fill the mold box, creating an upside silicone mold. This should be done on a level surface. Any silicone spilled after mixing can be easily cleaned off of surfaces once cured.
The silicone that I use has a 30-mintue demold time. After removing the lens from the cured mold, you should be able to see a mirror-like reflection in the silicone mold cavity as well. I wait 24 hours after pouring before using the mold. The mold should be kept covered or upside down after demolding the lens blank to protect the surface from dust.
Casting the final epoxy resin lens
I mix a clear two-part epoxy resin and pour it into the silicone mold. This should be done on a level surface, but note that spilled epoxy resin is very difficult to clean. Small sheets of flat glass removed from picture frames or purchased loose at a hardware store provide cheap, level surfaces to protect your table. After pouring, the mold must be covered (without anything touching the epoxy surface) to prevent dust from falling into the epoxy. Even a small dust particle will create a large defect in the finished surface due to surface tension.
The epoxy resin that I use takes 24-48 hours to cure. After the resin is cured, the lens can be removed. If the original lens blank was polished properly, then the epoxy lens will emerge with the same polished surface and be ready to use without further processing. The general performance of a convex lens can be quickly examined by projecting an image of a window or lamp onto a flat, white wall or a sheet of paper.
Usage
I used the large objective lens and small eyepiece lens shown in the photo above to print a Keplerian telescope with around 10x magnification. I found the image quality to be quite good for a telescope derived entirely from 3D-printed parts; it is generally usable and capable of resolving distant writing. Of course, using only two spherical lenses made of the same material, it inevitably suffers from spherical and chromatic aberration.
Spherical aberration could easily be avoided by printing the lens blank with an aspherical shape (as I do when printing telescope mirrors with the shapes of general conics). I have not tested a solution to chromatic aberration yet, but I expect that it can be dealt with by either including an additive in the epoxy resin to modify the dispersion, or using a different type of resin altogether such as UV-cured acrylic which will almost certainly have distinct dispersion. Then, standard designs such as an achromatic doublet can be created.
Back to Index